When I blogged 10 Photography Tips for Food Blogging, it seemed to go down a storm. Which considering my amateur status as a photographer and blogger, is both flattering and humbling. For me, the best blogs are those where the content (particularly the photos) is top notch. Never more so than with food blogs because lets face it, reading a recipe isnt exactly riveting is it? Yet when it comes to food photography, us food bloggers have a tough time of it. We not only have to cook something delicious and appetising, but we have to photograph it in such a way that makes your mouth water.Yes, having some basic photography skills helps but what really makes food look appetising and stand out, is the styling.
Food styling requires a degree of forward thinking and planning before you even start cooking but it is easy to master and after time, becomes a fun aspect of food blogging. So based on what I’ve learned over the years, from experience, trial and error and a LOT of extensive online research, here are my top tips for food styling.

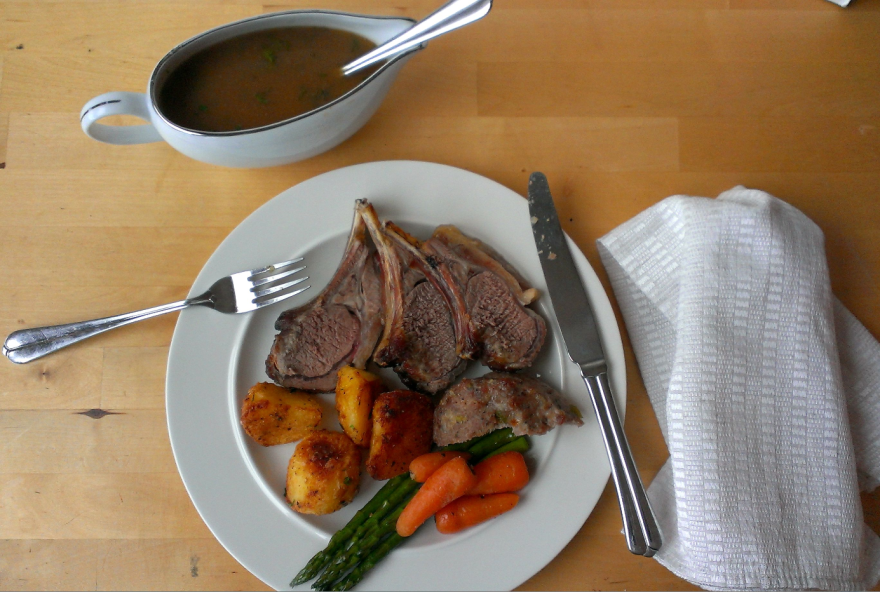
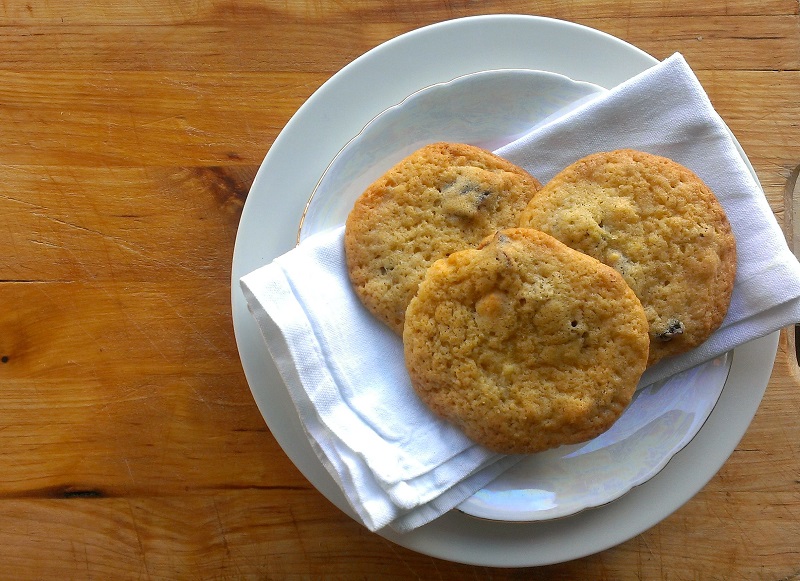
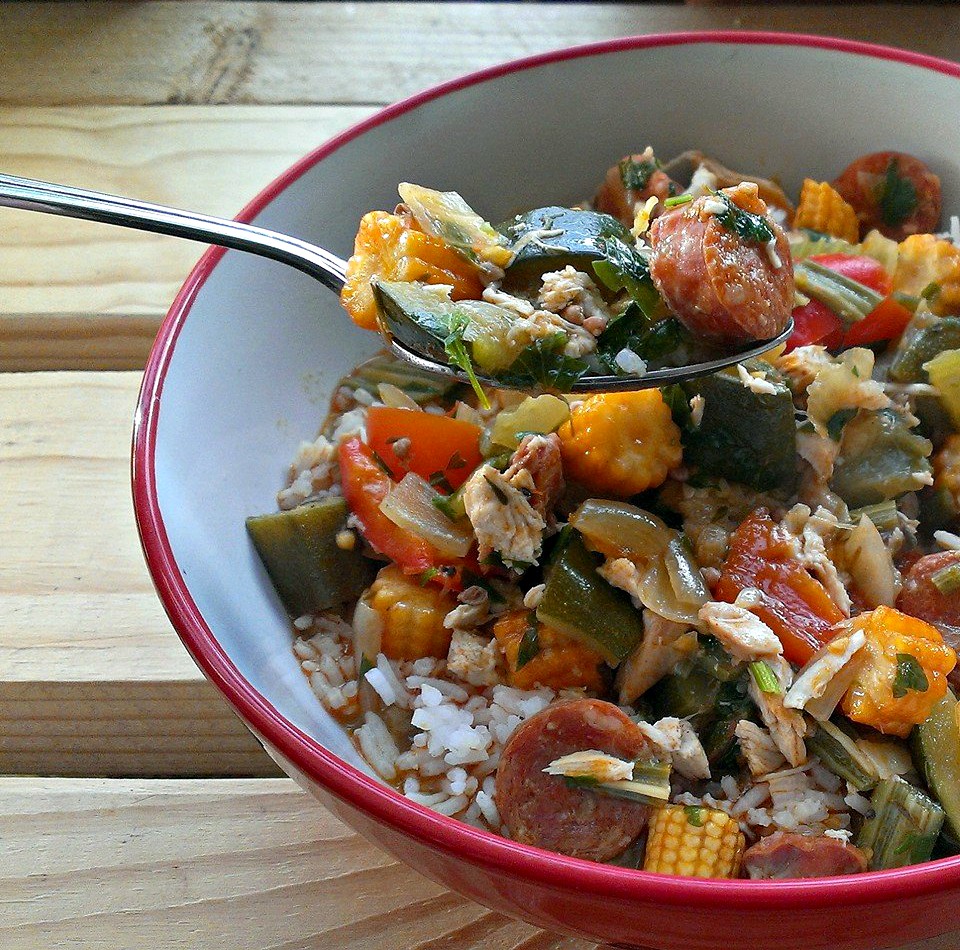
When it comes to photographing food, the crockery on which the food is served should always be white. White plates allow food to stand out and removes any unwanted distractions, such as the pattern on the plate. White is also a clean neutral background and you can add colour with props and backgrounds. You can always add interest and texture to the shot by adding napkins, layering several plates on top of one another and using a contrasting background.
Unlike professional food stylists, we food bloggers are generally limited with whatever is in their kitchen cupboards and the plates we eat off. If you do want to upgrade purely for blogging then don’t bother with buying a whole new set of crockery. Just invest in 1 white dinner plate, 1 white side plate and 1 white bowl to get you started. This is where IKEA becomes a food stylists dream.

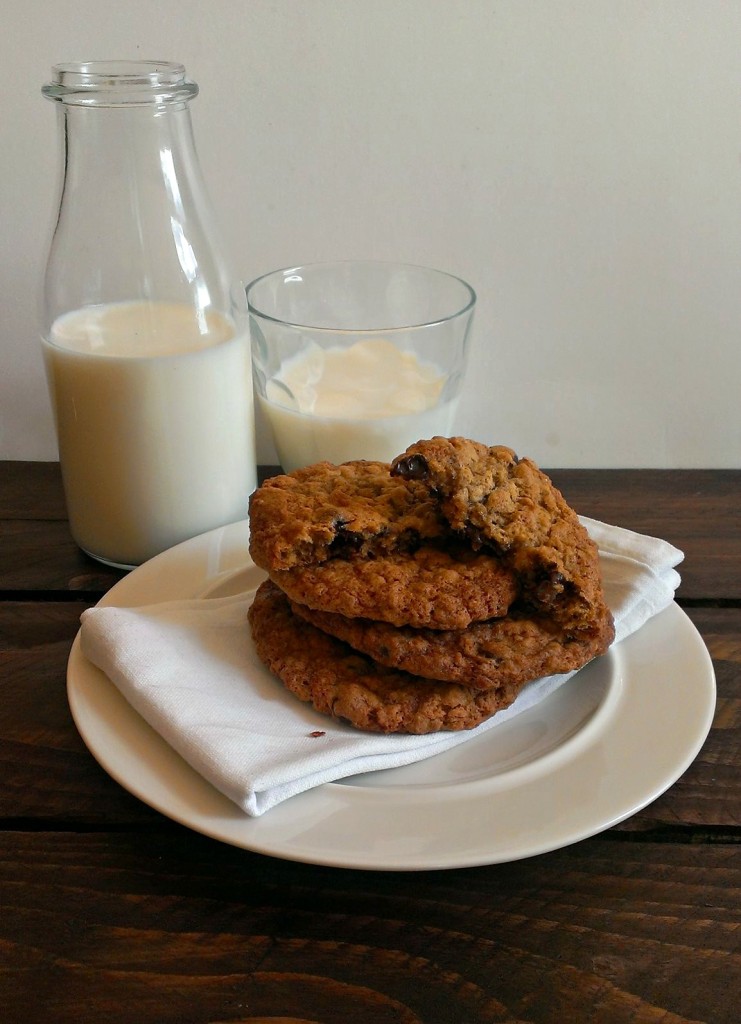
Before you start cooking, have a think about the dish you’re creating and the theme of the meal, then scour your home and garden for items to set the scene. For example: use chopsticks, rather than a fork, for an Asian-inspired stir fry, or set a bottle of milk in the background of a pile of freshly baked cookies.
I’m willing to bet most food bloggers will have accumulated a cupboard-full of props like these over the years. If you’re starting out, or you don’t have the luxury of stockpiling kitchen equipment for blogging, no doubt your home and garden can produce items for setting the scene.
For example, I’ve used a tartan bow tie as a napkin holder for a Burns night meal and foraged golden Autumn leaves from the park for my pumpkin pies. Anything can be used if you allow your imagination to wander a little, and Pinterest is a fab place to go if you’re looking for inspiration.
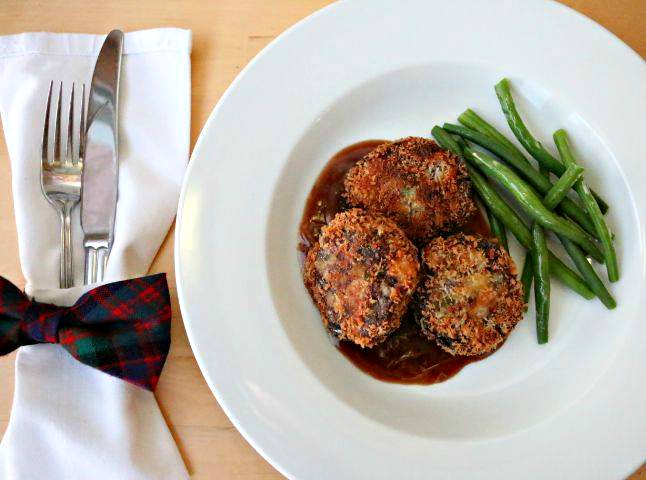

By background I mean the surface you’re setting the (white) plate on and, depending on the angle of the shot, becomes the background of the photograph. My favourite background is my white dining table because it means I can play around with different coloured props or use a variety of props, which can get lost in a fussy background. However, a white plate on a white table can become a little dull if it’s repeated over and over. I find my reclaimed pallet coffee table and wooden butchers block are excellent backgrounds for creating a cosier, more rustic feel to the shot and are a nice change from plain white.
If you don’t have a suitable table or work surface to photograph on, you can always play around with other cheaper materials: for example, a large piece of marbled paper, a wooden dinner tray and a white tablecloth. I’ve even used a fushia pink scarf as a tablecloth.
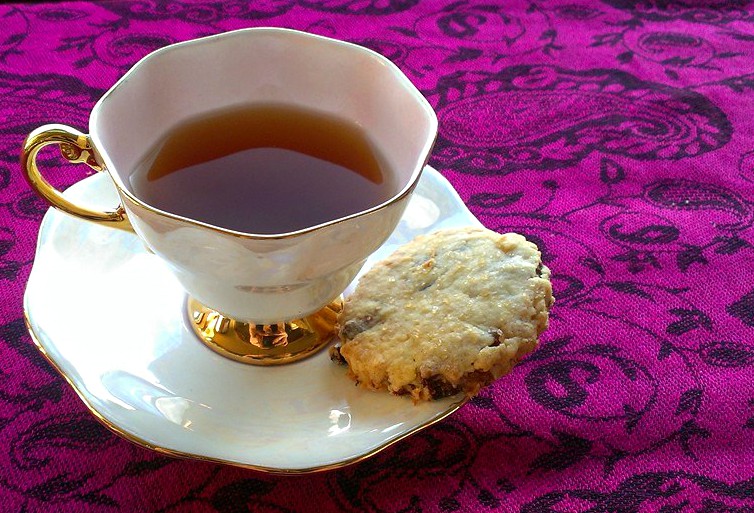
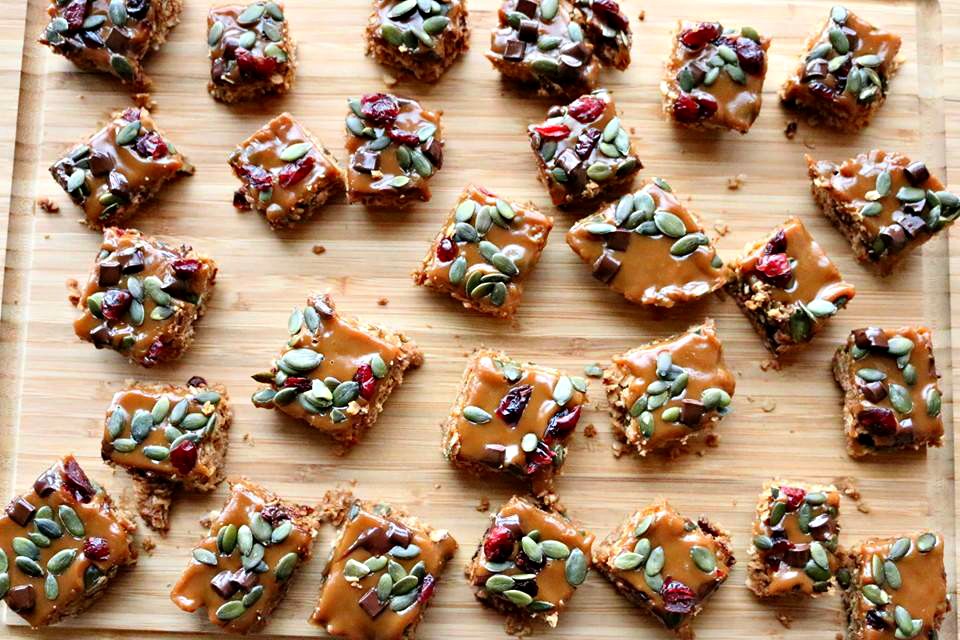
Yes, plates, glasses, cutlery etc should be scrupulously clean before shooting however that doesn’t mean I aim for perfection. You’ll never find me plating up food with tweezers before photographing. I’m a blogger after all, not a professional food stylist and home cooking isnt supposed to look like an advert for a Michelin restaurant. So I say, within reason, embrace the mess. Icing dripping down a cake, cookie crumbs and cheese oozing out of a burger are what draw me in and make my mouth water.

This is 1 of my favourite tips for styling food and very useful for photographing cold beverages: chill the glasses.
When photographing beverages, be it milkshakes or cocktails, place the glass in the freezer 10-15mins before you want to shoot the picture. Once the glass is cold & frosty, add the beverage and shoot immediately. Maybe even keep a 2nd glass in the freezer on standby just in case. The condensation dripping down the sides of the glass will look incredibly mouthwatering and enticing.

There are some photography shots where assistance is required, and this is where you call in your blogger husband/wife/girlfriend/boyfriend. You know, the one who probably has to wait an extra 20 mins for dinner every night while you photograph the meal?
Some photographs require a little interaction and movement (e.g. kneading bread dough) and it can be impossible to capture this on your own while balancing a camera and sometimes a light reflector. Not every shot needs an assistant but think about the dish you’re creating, how you want to shoot it and plan ahead. For example, are you shooting spaghetti? Then you might want someone to wind the pasta around the fork & have it hover over the plate. Or are you photographing pancakes & trying to achieve that oh-so appealing maple-syrup-being-drizzled-from-above shot?
The genius of being a food blogger is you can pay your assistant in food afterwards.

Food looks most appealing when its photographed within minutes of being served. Salad wilts, meat dries up and fizzy cocktails become flat. The only way to overcome these issues is to prepare the shot in advance and photograph fast. However there are some wee tricks of the trade to make life easier.
- Always have some kitchen paper to hand to mop up those un-aesthetically pleasing spills or drips
- Invest in a cheap water mister and spray cold water onto fruit, salad or fresh seafood to add some texture and freshness
- Equally, brushing some warm oil or butter onto meat and vegetables can refresh them and make them look juicy again
- Finally, remember the power of a garnish to a dish. A final grinding of black pepper, a scattering of chives or a chopped chilli goes a long way to make a simple dish look incredibly appealing

My final tip for food styling is to make the shot look ‘lived in’. That is, make it look like you’ve interrupted the serving or eating of the meal to photograph it. It’s the same reason why bed-covers are often turned down invitingly in magazines, the photographer wants you to WANT to crawl into the shot. With food photography, we want you to want to join us eating this meal. Or at the very least, make it yourself.
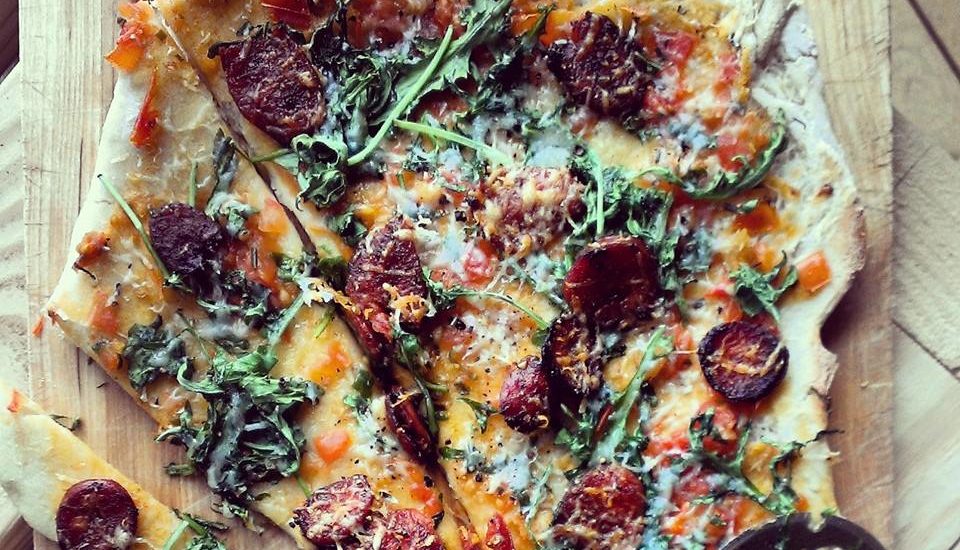
You can achieve this by cutting the pizza into slices and removing one slice, leaving the cutlery open on your plate as though you’re taking a rest, or taking a bite out of a cookie then capturing it on camera. After all, what’s the point in all this blogging business if we can’t enjoy the food?