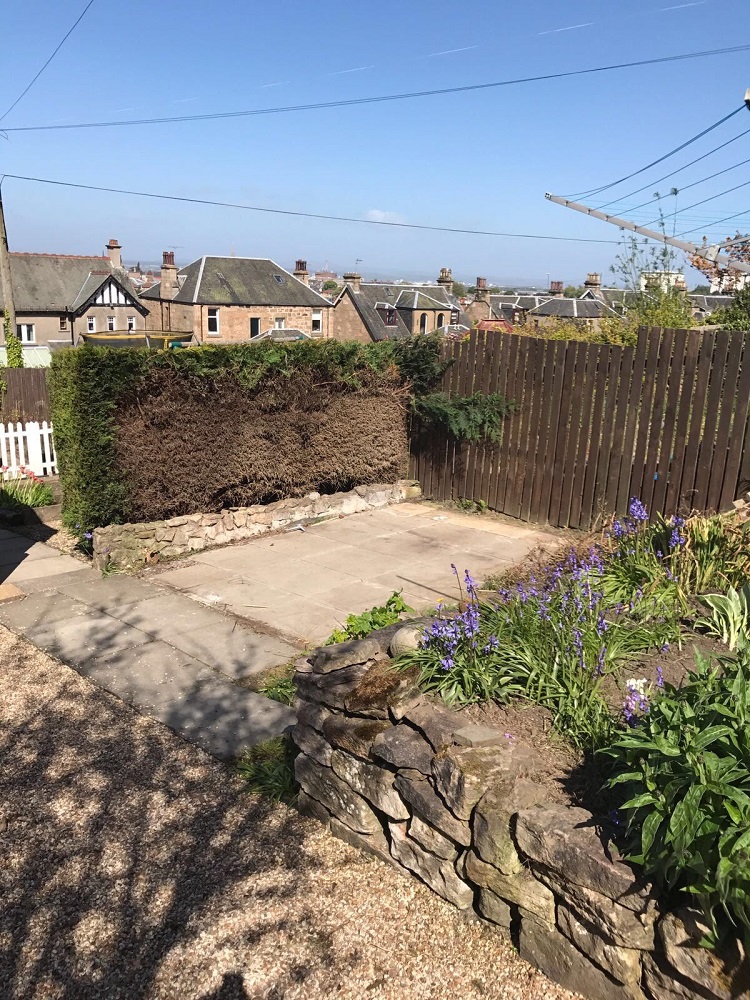
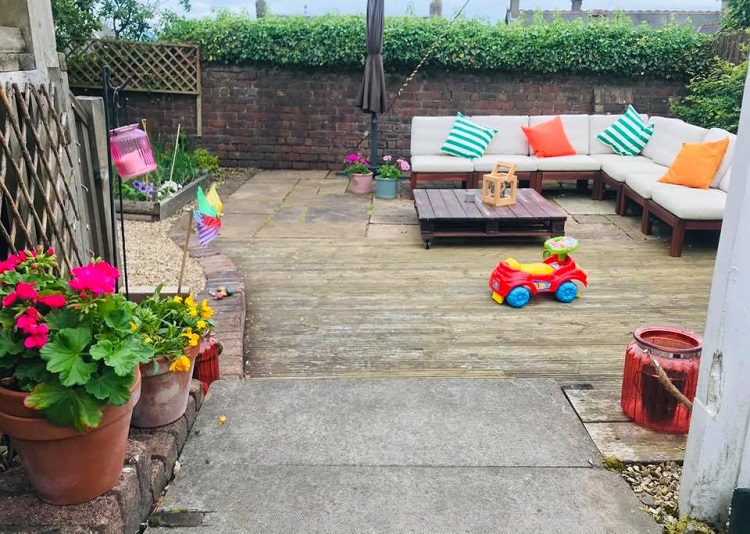
As much as I longed for a garden, when I did finally get one I’d be lying if I said I wasn’t completely overwhelmed with the whole thing. I’ll never forget standing in my garden 3 days after moving in, with a rough idea of what I wanted to achieve, and wondering how the heck I was gonna afford it. Also worth mentioned that up to this point I’d also never gardened in my life. But 3 years on, I’ve found that it is pretty easy to garden on a budget, with no experience, and still achieve a dream garden. So if you’re also standing there in your wellies, looking down the garden with the same concerns, don’t despair. Here are my tips for gardening on a budget.
Secondhand & Freebies
First up, check out Facebook marketplace, Gumtree, Freegle etc. These are good places to pick up the big ticket items like furniture, greenhouses, sheds, compost bins, wheelbarrows etc for a fraction of what you’d pay in the shops. You’re also likely to find people listing items for free, usually with the provision that you collect, dismantle & take away. Likewise, these are good places to list items in your garden that you no longer want or don’t have the time/inclination to get rid of.
For example, our garden came with a huge shed (in pretty awful condition) we didn’t want. We listed the shed and the paving slabs underneath it on Gumtree for free, and 3 couples came: 1 to dismantle & take away the shed, and 2 other couples for the paving slabs. This was all done within 2 weeks, it saved us the time and hassle, and allowed us to get on with turning the empty space into a lawn.
Rubble & Earth
Stones, gravel, chippings, and soil are, in my eyes, the worst form of garden waste to dispose of. Due to the weight and bulk you need to hire a mini skip: which is pricey. Instead I recommend incorporating this ‘waste’ into your garden.
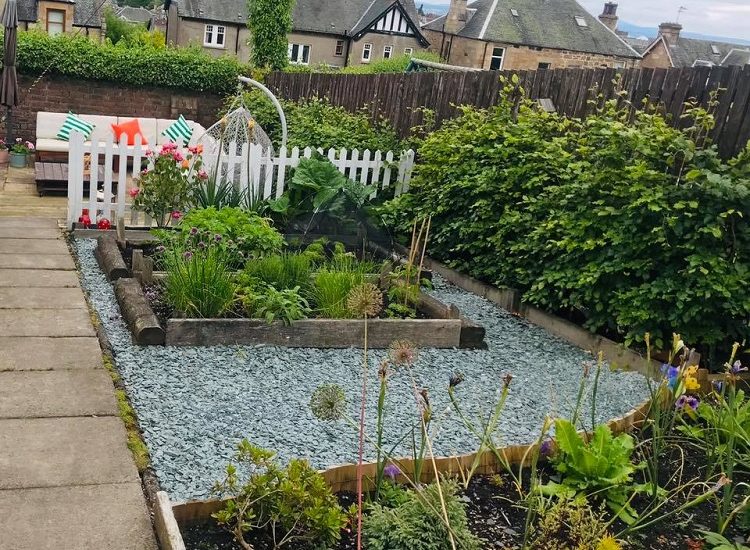
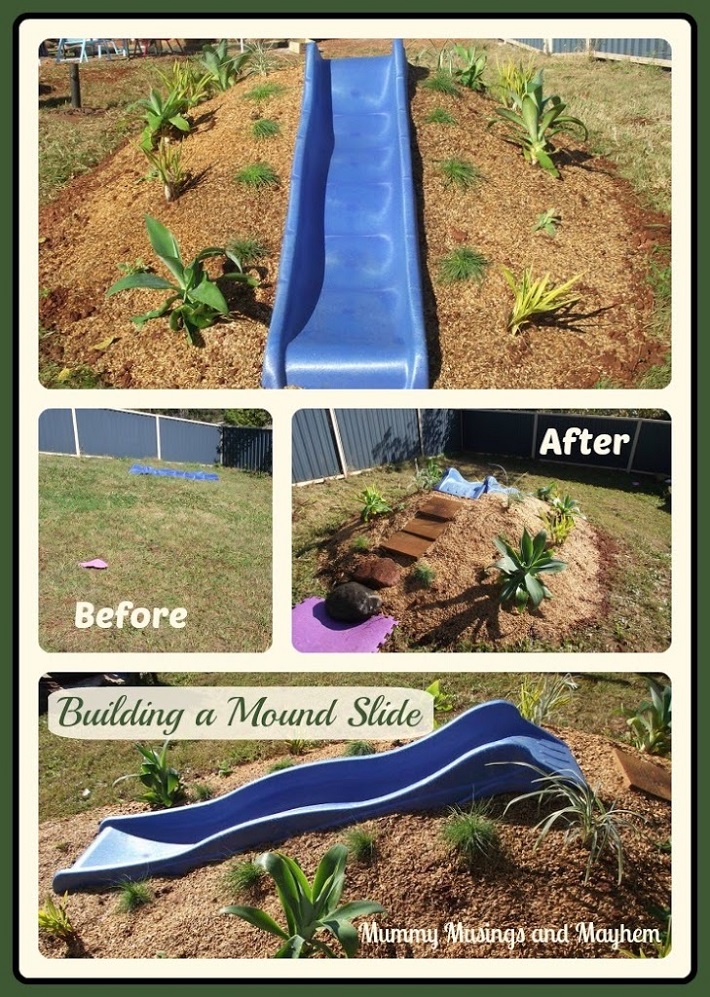
Gravel, stones and chippings etc can be dug into the soil to improve drainage (this is what we done with 1 flowerbed & the lawn). For large piles of soil I recommend creating a mound. You simply pile up the soil into a mound shape (as high or as wide as you like), ideally adding compost or well-rotted manure to it as you go. You can then lay turf, or sow grass or wildflower seeds including spring/sumer flowering bulbs. Or create a rockery with herbs & alpines and any stones/rubble you have. Its also easy to add spring or summer flowering bulbs too. Alternatively, why not create a kids play area with a built in slide? (sourced secondhand from Gumtree of course).
Bargain Shops
You don’t need to spend a lot on gardening tools. Most of my tools (and equipment) have come from bargain stores: B&M, Home Bargains, Wilko, Aldi etc. So don’t be dettered by the expensive equipment at fancy garden centres, nor should you feel you need a lot of tools to get started. For a basic gardening kit I would recommend:
- Spade
- Fork
- Hand trowel
- Secateurs
- Loppers
- Watering can or hose
- A rake (if you have grass)
I like using gardening gloves but they’re certainly not essential, and a big bucket is useful for gathering up weeds, clippings etc. But any old container will do. I use an old mop bucket. It does pay to care for your tools, no matter how cheap they are, if you want them to last longer. This means rinsing and drying them after use, sharpening them every winter (with a metal file), and storing them indoors.

Discount aisle
Most garden centres/shops will all have a discount aisle. If you pick your discounted plants wisely, you can end up with some excellent plants to enjoy for years to come. 2 years ago I bought an extremely tatty looking sage, and a miserable looking lupin all for about £2. Granted they didnt look that great in the first year, but by the following summer they were both thriving. So keep an eye out and don’t judge a book by its cover.
Grow from seed
Growing plants from seed is infinitely cheaper than buying established plants or growing from plugs (i.e. seedlings). Growing from seed will also open doors to a whole world of plants which might be out with your budget otherwise. But don’t be dettered if you’ve never sowed from seed before. It actually doesnt take much skill or equipment to do. Things like basil, sunflowers, sweetpeas are really easy to grow from seed. All you need is a few empty pots, a bag of potting compost, and a sunny windowsill to start them off. And a lot of plants can be sown directly into the ground around May when the soil is warmer. For my guide on how to grow your own sunflowers from seed click here.

Ask gardeners for plants & seeds
It is a well known fact that gardeners are more than happy to share seeds, plants, seedlings, cuttings, advice etc to anyone interested. So don’t be afraid of asking, you never know what you’ll come home with. Some of the nicest plants in my garden have come free from family; I’ve even got a couple plants from my sister in law’s neighbour after I commented on lovely they were in her front garden. She dug a few up, stuck them in pots, and sent me away with them. If you ever stop by my garden I can guarantee you’ll be heading home with a few pots of goodies as well.
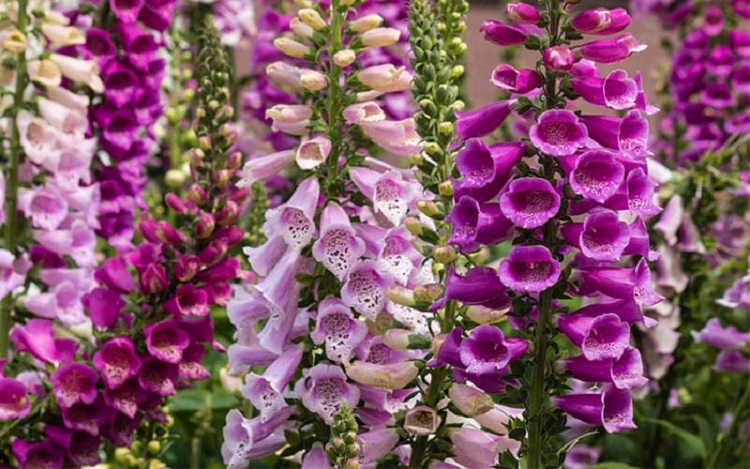
Self-seeding flowers
Self-seeding plants like foxgloves, poppies, marigolds and lucifers will all flower and release seed into your garden, which means free flowers every year. My garden started off with 2 foxgloves the year I moved in. This year we have approximatley 22 foxgloves plants ready to flower in Summer. You can grow self seeding flowers from seed or, if you’re unsure about growing from seed, then buy the established plants from garden centres.
Move plants around
Don’t be afraid of moving plants around your garden. If you have a hydrangea you love in the front garden, but want it out the back: move it. Or if you’re digging up a flowerbed to lay a patio or lawn, then keep whatever established plants are there to re-plant elsewhere. Depending on the size of the plant, you simply dig it up using a space or a hand trowell. If you are re-planting straight away then set the plant in a shady area until ready to do so. If you’re re-planting at a later date then you do need to place the plant into a pot, cover with a little compost and keep it watered.
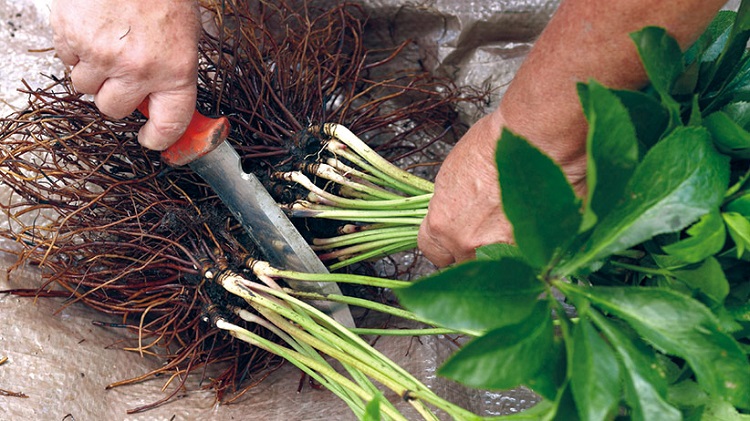
Divide and double
A lot of plants can be divided into multiple smaller plants, which means you can fill in empty spaces in your garden for free with a plant you know performs well. Any perennial (i.e. plants which grow back every year) like hosta, red hot pokers, lucifers, primulas, arum lillies, lily of the valley can all be divided and its really simple to do. You wait until they’ve finished flowering and dig up. If its a small plant you can tease it apart with your hands or using 2 garden forks. Or if its quite a big plant like pokers or hosta, then you can slice down the middle of the plant with a sharp spade.
Plant these divisions immediately and water in well. Yes they might look a little rough from being divided but by the following growing season they’ll be thriving.
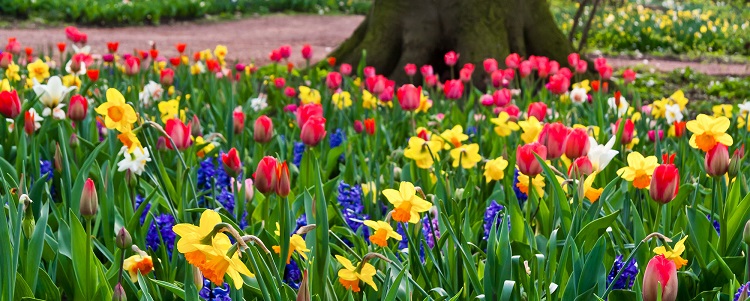
Stuff the garden with bulbs
Bulbs are a brilliantly cheap way to garden. For example, a big bag of daffodil bulbs will cost you less than a fiver, and you could get around 20-30 bulbs in there. Whereas you could easily spend £5 on a pot of maybe 4-5 daffodils. Bulbs flower from early spring through to late summer, so you can plant bulbs to give you almost year long display. Spring bulbs (daffodil, snowdrops, crocus, iris, tulips) are planted in autumn, and the summer bulbs (alium, freesia, begonia, gladioli) are planted in spring so you do need to plan ahead.
You can plant directly into the ground, or in the grass, or in pots. Just make sure the hole is deep and the bulb is pointing the right way up (the bag will give you instructions).
Free compost
Compost is where I spend the most amount of money in my garden but if you want to save money in this area then you have two options: (1) make your own compost, or (2) check your local council to see if they offer free compost from the collected garden waste.
Making your own compost is actually easier than it looks, and it allows you to cut down on kitchen and household waste sent for recycling. If you want more info for how to make your own compost, there is a good guide here. Alternatively council compost is free and you can generaly take as much as you need. The downside is you’ve no guarantee whats in there and could result in introducing new weeds to your garden. If you are organic then its also highly likely the council compost is not.
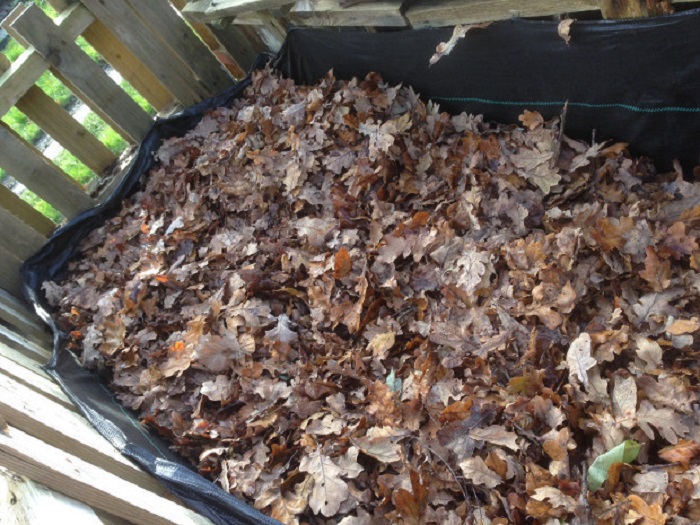
Make leafmould
Leafmould is an amazing by-product of our environment and is great for your garden. It’s also completely free. If you can’t or don’t make your own compost, this is a good alternative option for improving your soil for free.
Leafmould is simply rotted leaves. In Autum you collect all the fallen leaves into a bin bag, poke a few holes in it, and add a little water. Leave it tucked away somewhere in the garden for a year. After this time it will have rotted down into a light cumbly texture. You can use this as a mulch, dig it in your soil, or use it with potting compost to pot up plants/bulbs.
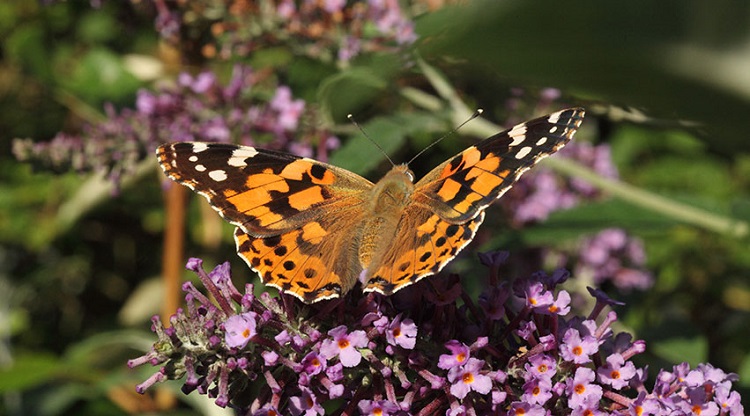
Organic and natural gardening
Organic and natural gardening is not only better for the environment and produces better quality food and plants, but its cheaper because you won’t be spending money on expensive pesticides and insecticides.
By allowing the natural order of the garden & the wildlife to take control you accept that a balance will eventually be struck. For example, I have several hostas in my garden and by the end of summer they are full of holes becuase the snails feast on them. Now as sad as it is to have my hostas resemble lace, I’m actually pretty happy with this set up. The snails are important to the garden, they attract birds who feast on them. Also, because of the lure of hostas at one end of the garden I’ve never had a big problem with snails or slugs eating my vegetables at the other end. And finally, an organic natural garden its also safer for James. I don’t have to worry about him eating slug pellets or eating chives sprayed with chemicals.
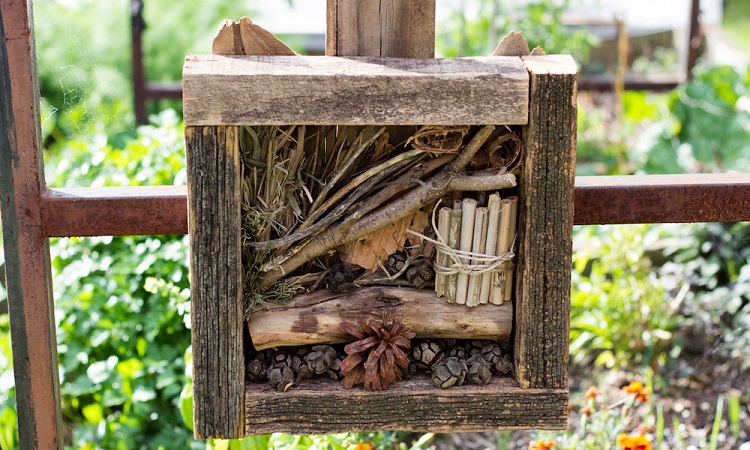
Make a wildlife hotel
Wildlife hotels are a great way to welcome crucial wildlife to your garden, and it’s a fun activity to get the kids involved in. But don’t go buying one, make it with anything lying around in your garden, or even forage in the woods or park for items. Things like logs, sticks, twigs, branches, stones, bricks, pine cones and pebbles can all be used to create a bug hotel. There are loads of guides available online, but some of the best ones I’ve seen are simply piles of natural items tucked away in a quiet corner of the garden where they won’t be distubed. This alone will create a welcome natural habitat for plenty of wildlife.
Grow or source your own fertiliser
Fertiliser can be fairly pricey, even more so if its organic but there are cheaper options. If you live by the sea you can source seaweed which is an excellent fertiliser and a natural slug/snail repellent. To harvest seaweed sustainably collect it only from mid-beach, not close to the shoreline, and take no more than one third of any given patch. Spread the seaweed thickly over your soil within 36 hours of collecting.
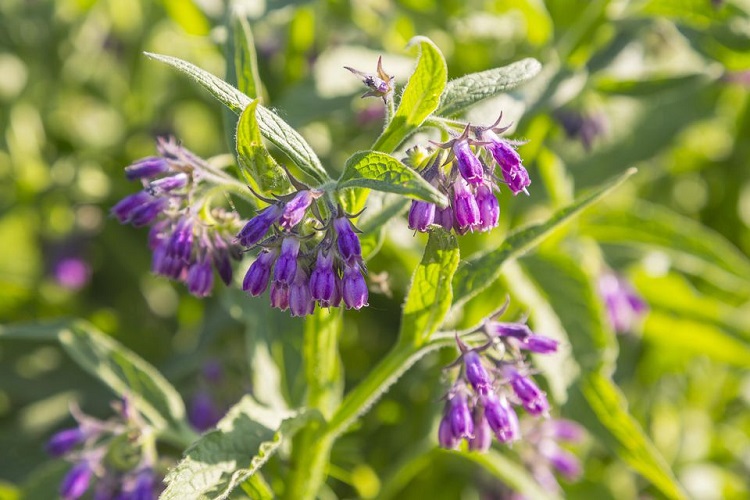
The second option is to grow comfrey to make comfrey tea: a natural liquid fertiliser. Plant comfrey in a sunny spot and it’ll grow for years. Once established, cut the leaves off (but wear gloves) and stuff them into a container with a lid. Top with water, replace the lid (it’s pretty smelly stuff) and tuck it away in a quiet part of the garden for at least 4-6 weeks. After this you will have a concentrated fertiliser which you dilute 1 part feed with 20 parts water. Use it as a summer feed on anything in your garden.
Finally, keep your used coffee grounds. You can scatter these onto the soil or dig it in. This will add organic material to the soil which improves drainage and aerates the soil. It will also help attract worms, which are good for the soil and consequently your plants.
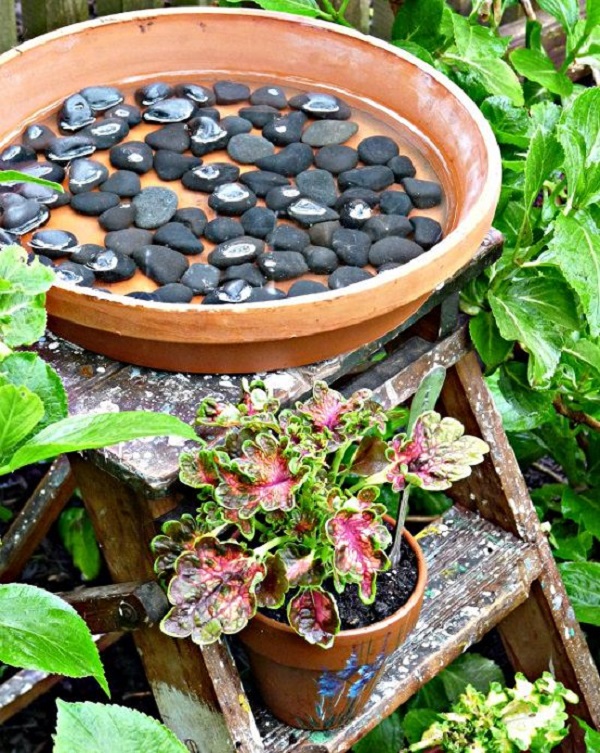
Make your own bird bath & food table
Birds are so important to our gardens and many species are suffering badly from decline so it’s important to provide them with food and water for bathing. A bird bath and food table can be rustled up with materials from your house & garden. Just make sure if you do put food out for birds, you do so consistenly throughout the year.
A stack of bricks and a wide shallow bowl on top, with a few pebbles placed inside is a perfect bird bath. And any raised flat surface is perfect for a bird table. Check out Pinterest for inspiration and get the kids involved in the design and decorating. Place it within view of the house so you can spot the visitors to your garden.
Free pots
If you are keen on growing from seed then you will need pots. As most plastic posts can’t be recycled its good practice to re-use old pots rather than buy new. Ask your friends, family and neighbours for old pots; or check out garden centres, most will give them away for free too. Just remember when using any container secondhand, to give it a wash in hot soapy water beforehand to remove any diseases and pests. Alternatively get creative and transform any old containers into seed trays and pots: egg cartons, plastic bottles, yogurt pots can all be used and re-used for growing seedlings.
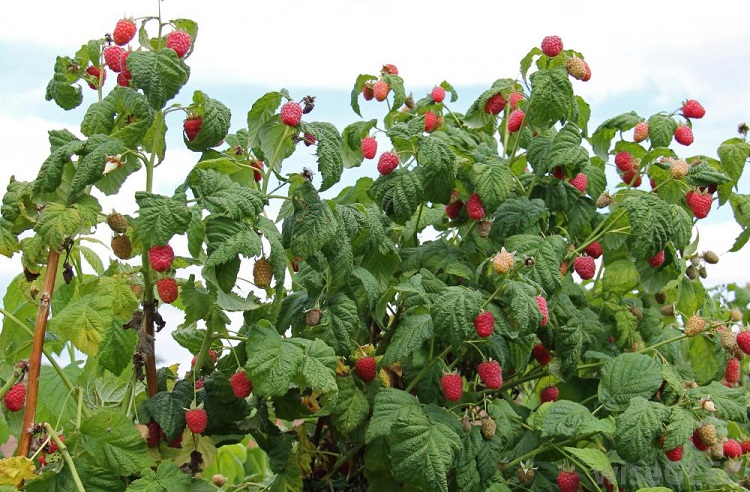
Grow fruit bushes
Unlike most vegetables, fruit will grow back year after year so it actually works out to be a cheaper plant to grow in the long run, becuase you reap the rewards for longer. Fruit trees like apples, pears, and plums are more expensive to buy compared to soft fruits like strawberries, blackcurrants, blackberrieds, gooseberries, rapsberries. However there are options to buy them cheaper (see next tip).
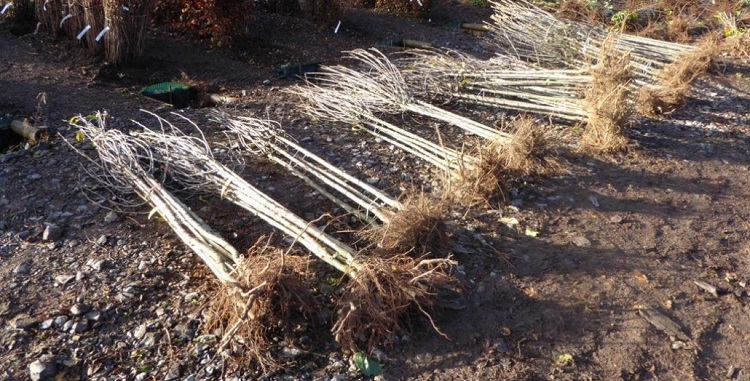
Buy bare root
One of the cheapest way to buy plants is when they are dormant. This means they will contain the root ball and some twiggy growth only on top. You buy and plant in the dormat season (i.e. winter), when frankly the plant is looking a little dead. And come spring, summer, and autumn they suddenly burst into life. So if you’re wanting trees, hedges, roses, hydrangea, fruit trees, etc then it’ll work out cheaper to buy them bare root.
Upcycle or DIY
With a little imagination (and a Pinterest account) there is no limit to what you can upcycle or DIY for your garden. Some of my favourite upcycles are quirky planters made from toy trucks, wellies, buckets; greenhouses made from window panes; plant labels made from bottle corks; and of course there is no end to what you can do with a few pallets. Have a rummage around your house or charity shops, check out Gumtree the Marketplace, and let your imagination run wild.
Create your own lawn
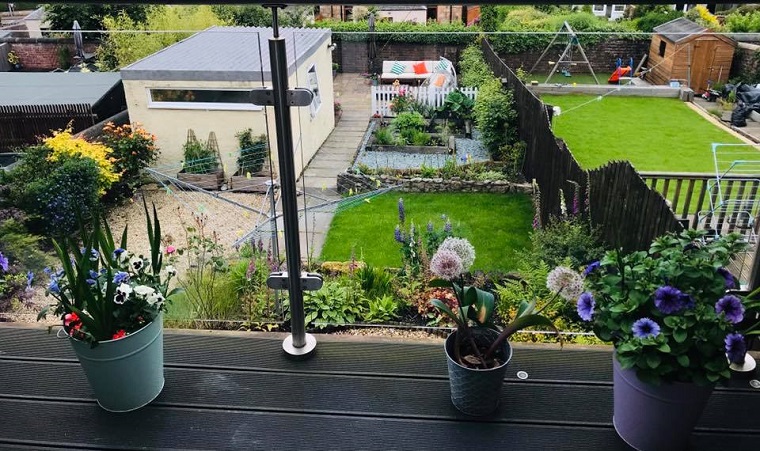
Trust me when I say that creating a grassy lawn is not outwith your reach or budget. Yes the cost will be determined by the size of the area you want to cover in grass, but even then you still have a couple of options to keep costs down. It will take a bit of work but it is doable even for a complete novice. In fact, I laid our lawn when I was 6 months pregnant.
The trick to a good lawn is in the prep. This means digging in good drainage (i.e. small stones, sand or grit), removing all the weeds, laying topsoil, and stamping it out to get a good flat surface. We done all this manually but if you have a big area then you can hire a rotavator and a roller to do the bulk of the work for you. You then either lay turf (which is pricier but you get a lawn faster) or seed (which is cheaper, but takes longer). if you want a grassy area for wildlife, and don’t really want the hassle of a normal lawn, then try creating your own wildflower meadow by sowing wildflower seeds. I used Monty Don’s advice and 2 years down the line the lawn is still in brilliant condition.